The name “kitchen knife” often refers to any knife used in food preparation. While preparing food, a cook uses different types of kitchen knives for different tasks.
Some of the most used kitchen knives are chef knife, bread knife, cleaver knife, gyuto knife, paring knife, utility knife, etc. There are also some knives which are used to cut the cooked food such as steak knife, knife for cutting ribs, etc.
However, people are often confused about how or in what ways they will sharpen their kitchen knives. The purpose of writing this article is to highlight the techniques of sharpening kitchen knives in a detailed and easy way.
Is It Difficult to Sharpen a Knife?
On television and movies, sharpening is often portrayed by a chef intimidatingly and rapidly slashing a knife across the sides of an iron rod.
Although it hones the blade but does not sharpen. There are many more nuances and techniques than the silver screen displays.
While sharpening a knife may seem like a difficult task, it is not; anyone with some general knowledge, suitable tools, and some experience can do this job well sitting at home.
Why Do You Need to Sharpen Your Kitchen Knives?
Besides the benefits of an adequately honed blade, carrying an incredibly dull blade carries its own set of risks. When a knife’s edge is dull and inconsistent, the user naturally has to put more effort into cutting food.
In doing so, if the blade were to slip, the user will have very little control and time to react as a result of the extra pressure put into cutting the produce. This could result in severe injury and possibly loss of a digit.
How Do You Know If You Need to Sharpen Your Kitchen Knife?
There are many tests to find out whether or not your knife is sharp enough. The paper test is probably the most known.
By taking a piece of paper and holding it by a corner, take your knife and slice it down, trying to cut it. If it glides through easily, it’s great. If not, it needs some honing and sharpening.
For those who are basically inexperienced chefs, for easy maintenance, the blade should be sharpened as soon as it starts showing signs of dullness.
What Are the Benefits of Sharpening Your Knife?
As stated before, your food prep will transform from some painstaking chore that you labor over to the highlight of your day.
A nicely sharpened knife can finish a job that would typically take 5 minutes of deliberation and effort into 1 minute of clean and satisfying chops and cuts. Your sliced vegetables will be more uniform, consistent, and presentable.
When it comes to restaurant-quality food, consistency is a significant key to success. Did you know that professional chefs at top-class restaurants aim to hone their knives multiple times daily and have a thorough sharpening multiple times monthly?
When you want to cook, for example, a steak, larger pieces will take longer; however, when you portion pieces consistently, there will be a standard cook time throughout.
A more refined edge allows for finer minced garlic or mushrooms that’ll possibly transcend a dish from a homemade meal into a work of culinary art.
The benefits of a sharper knife aren’t just mental and physical, but also chemical.
We all know that inevitable and inescapable burning sensation of cutting through onions. The burn emerges from a chemical the onion releases when cut into, and a dull knife only exacerbates this problem.
The blade will tend to tear and drag through the onion, releasing more of the burning formula into the air. With a thin edge, your cuts will be smooth and leave the onion while releasing minimal volumes of the chemical.
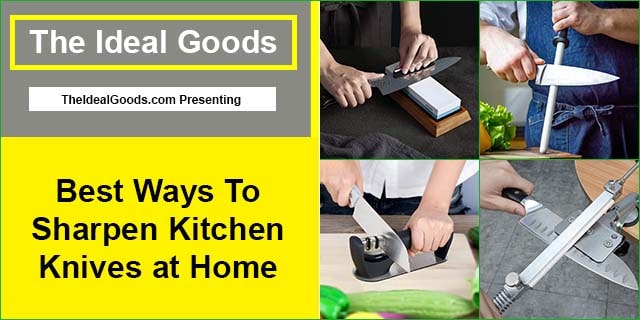
What Are the Best Ways to Sharpen a Kitchen Knife?
So now that you want to begin sharpening your trusty old kitchen knife, what do you need, and what are your options?
There are three main methods to sharpening your knife when it comes to kitchen knives, and each one has its benefits and downsides.
- Honing Rod
- Whetstone
- Pull-through Sharpener
- Self-Sharpening Block
Way-1: Sharpen Your Kitchen Knives with a Honing Rod
The first method I’ll be introducing is the honing rod, otherwise known as honing steel. This tool looks somewhat like a sword with a rod composed of tough material, typically steel, diamond-coated steel, or ceramic attached to a handle.
And although there exists much debate about whether or not the honing steel sharpens a blade, it is indisputably vital to maintaining its quality. The significance comes when you see the microscopic image of the knife’s edge.
Although it looks smooth and solid in life-size, the edge of an unhoned blade is rigid in reality as if constructed by a continuous stream of tiny peaks and valleys.
Over time these peaks will bend into different angles and directions, which creates the “tearing” effect described in the onion scenario. A honing rod simply keeps the micro hills aligned.
The first step to using a honing rod is to figure out which to use or buy. Because you’re using the rod to fix the knife’s edge, the rod must have a higher “toughness” than the knife.
In general, a steel honing rod will work for most regular home knives. However, if you know that your knife is of a tougher material, a ceramic honing rod will generally work for all cases.
Now that you’ve chosen your rod, let’s get into the procedure.
Step-1: First, set up a towel or some cloth that won’t slide in front of you.
Step-2: Now hold the rod in a dagger-like fashion in your non-dominant hand and vertically set the side opposite of the handle on the towel.
Step-3: To “hone” your kitchen knife, simply place the bottom edge of the blade onto the rod and the dull side of the knife on the hilt so that the knife creates an angle with the rod.
Step-4: While keeping the angle consistent throughout the motion, gently slice downward, making sure the movement reaches the entire edge of the blade.
Step-5: It is essential that you do not apply too much force during the motion and repeat on both sides equally.
Way-2: Sharpen Your Kitchen Knives with a Whetstone
The second method I’ll be introducing is the whetstone method. This is the most traditional method when it comes to sharpening your kitchen knife with a whetstone.
It often utilizes a set of 3 stones of different grit, which just means coarseness or roughness. The blade is then slid across the stone multiple times on each side to shave off varying amounts of steel to create a thinner edge.
Like the honing rod, the type of whetstone(s) you use is essential.
For beginners who just want to take care of their trusty kitchen knife, there are whetstones with two sides of different grit, but for those who are experienced, a set of three grit stones is sufficient for most needs.
The general consensus is as follows:
● 1000 grit and below: Even out chipped and damaged edges
● 1000 – 3000 grit: Sharpen a dull edge
● 4000 and up: Very fine polishing and finish
It is crucial to notice that the higher the grit, the less rough the stone, and so the sharpening process on a specific stone will be slower if it has a relatively high grit.
IMPORTANT: All grit stones may have specific and different instructions
Now that we have the basics covered, here is the procedure.
Step-1: Prepare the Stone
The first step is preparation: soaking or wetting the stone. The amount of water exposure needed is often stated in the packaging or instructions.
In addition, some stones will require the use of oil or lubrication. It is important to follow the steps of each stone before beginning any sharpening.
Step-2: Choosing the Angle
The second step is choosing the angle at which you keep the knife. This angle is often 10-20 degrees, which can be imitated using around 4-7 quarters depending on the width of the blade.
This is the angle that you must maintain consistently throughout sharpening to create the best edge.
Step-3: Start Sharpening
With the whetstone that best suits your needs, hold the full tang or half tang knife with one hand, then equally and gently pressure the blade with the other and slice across the stone with an arcing motion starting with the heel of the knife and ending with the tip of the knife.
Again, it is critical that the angle is kept consistent throughout this motion and that each side of the knife receives equal treatment.
After various strokes, it may be necessary to splash the whetstone to get rid of the shaved steel of the knife.
Step-4: Care for Whetstone
Repeat step three until satisfied, and be sure to clean and then dry the whetstone to preserve the condition of the whetstone.
Way-3: Sharpen Your Kitchen Knives with a Pull-through Sharpener
The final and most modern method I’ll be introducing is the pull-through sharpener method. This tool has the same foundation as the gritstone, which is to grind down the blade’s edge to make it thinner and sharper.
It is much simpler and, as the name suggests, involves pulling the kitchen knife through two slots of different coarseness.
Pull through sharpeners are extremely simple to use and often have around two to three slots. Those with two have slots for coarse and fine edges, while the third is for serrated knives.
The simplest of these tools will only have two. With the essentials covered, let’s get into the sharpening.
Step-1: Make sure that the sharpener is fixed in place securely.
Step-2: Starting with the coarse slot, place the knife’s heel into space and simply pull through as the name suggests. You don’t want to be pushing down too firmly nor gliding it through without putting any pressure. For the coarse side, 8-10 strokes are often adequate, depending on the dullness of your knife.
Step-3: Now repeat step 2 with the fine slot. This may require more strokes than the previous due to the smaller grit.
Way-4: Self-Sharpening Kitchen Knife Block
Self-sharpening knife sets are having a block that sharpens your knife every time before and after you use it. One or multiple storage slots in a self-sharpening block has a blade-specific ceramic sharpener that works best for household blades. Each slot is designed to sharpen a particular blade; not one or the other.
Final Tips and Tricks
Now that you’ve completed this comprehensive guide to sharpening, what kinds of final aids and tricks can help you with this new experience.
(I) Building A Routine
When you notice that your knife isn’t cutting as well as before, it may be good to start with a few slices across a honing rod. If that doesn’t fix it, then moving onto the whetstone or pull-through sharpener will be the likely solution.
(II) Starting with an Old Abandoned Knife
By starting with a knife you don’t care much about, your potential mistakes don’t break the hearts of your family or yourself.
(III) Practice, Practice, and Practice
With experience, you will be able to get a feel for things like the angle of the blade and the necessary strokes.
(IV) Don’t Be Crazy with the Grit
When using a gritstone, be careful not to go too crazy with the grit. It’s important to remember that the sharper your blade, the thinner it is and, therefore, the more fragile it will be.
Any higher than 4000-6000 may be too fine for a knife used for cutting meat as the muscle and tough parts of the beef will ruin the knife’s edge.
(V) Taking Care of Your Kitchen Knife
When it comes to maintaining your knife’s health, storage is just as necessary as sharpening. Be sure to keep it in a place where the edge won’t collide or bang into other objects.
(VI) Patience
A common mistake with the gritstone is that people will switch from the lower grit too quickly. If you aren’t getting the desired effect, this may be your problem.
(VII) Maintaining Your Gritstone
Keeping your gritstone healthy is just as important as the knife. With prolonged use, the whetstone will naturally become uneven, and this will reduce its effectiveness. It may be worth it to invest in a new gritstone.
Final Verdict
When done correctly, sharpening your knife will turn food prep from a chore into a hobby. It’ll make any knife, no matter the price, feel like a premium companion worth its weight in diamonds.
The blade will glide through tomatoes like a breeze flows through bedsheets hung out in the summer’s sun.