Many home chefs think they can wing it and sharpen their knives freestyle with whatever they have on hand – I know I was guilty of this myself.
However, you can do more damage than good this way. Plus, it would be pretty silly to keep buying new knives when your current set dulls.
If you’re reading this, it’s probably because you are in the predicament where your kitchen knives have dulled.
Let’s think of it this way: If you were taking an exam after a Knives 101 class, proper care is the right answer. Replacing the knives is most likely the wrong answer if your other choices include sharpening or honing your knives.
Don’t go out and buy new knives if you haven’t tried sharpening those already resting in your kitchen.
In this article, I will share all the basics and tips I learned that will help you properly sharpen your kitchen knives with care. Even $10 knives can achieve a jaw-droppingly sharp edge by following these steps.
This guide will save your money in the long run and, more importantly, it will save your fingers from the threat of dull knives slipping all-around your cutting board.
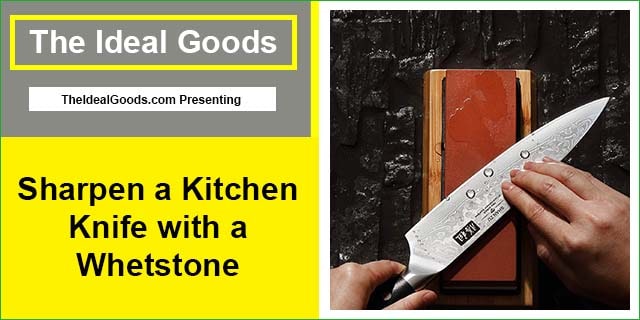
Is It Difficult to Sharpen a Kitchen Knife with a Whetstone?
Sharpening your kitchen knives is nothing like doing the dishes or taking out the trash. It should not feel like a mundane household chore. Rather, using whetstones to sharpen blades can be a zen and therapeutic process, so have fun with it!
You do not have to be a Japanese master sharpener to sharpen knives with a whetstone. Anyone can and everyone should be sharpening their kitchen knives.
This step-by-step guide will teach you how to keep your steel knives functioning at their best quality. After a few knife sharpening, you may even start to feel like a Japanese master sharpener yourself.
However, if you think frequently knife sharpening is a hassle or you do not have enough time for this task, you can try using a good self-sharpening knife set.
When Do I Need to Sharpen My Kitchen Knife?
While knives may need to be honed once a week to keep them aligned, they only require sharpening a couple of times a year, if that.
Most of us prefer to sharpen a chef’s knife which is commonly used every day. A good rule of thumb is to sharpen when honing no longer works.
In other words, when the knife has nicks in it or has become extremely dull.
Step-1: Picking a Whetstone
When shopping for whetstones, you will find a wide variety of different sizes, shapes, and types of materials. You may want a pair of whetstones such as a 1000 grit go-to and a finer 2000 grit stone to finish off with.
The 1000 grit or less stones are coarse and ideal for damaged knives that have nicks in them or have become dull.
Meanwhile, medium whetstones are those between 1000 and 3000 grits.
The 4000-8000 grit range would consist of your finishing stones.
The 8000 would be okay for a knife used only for fruits and vegetables, but you wouldn’t want to go past 4000-6000 for a knife that will be used to cut through meat muscles as that could bend the knife.
Instead of a pair, you can also opt for a double-sided whetstone, which is pretty cool! King, Mizu, and Tatara are all good brands if this option interests you.
They each sell double-sided whetstones with both a fine 6000 grit side and a coarse 1000 grit side — one side for sharpening and the other for polishing.
These are available on Amazon for about $30 and are eligible for free Prime shipping.
Keep in mind that a coarser or lower grit whetstone will abrade the metal faster, but will likely leave behind scratches.
A finer or higher grit stone will sharpen the knife slower, but leave a more polished finish on the blade.
It is widely accepted to use neither a pair nor a double-sided whetstone.
Many people get fine results from sharpening with just a 1000 gritstone and skipping the higher-grit polishing stone step.
Step-2: Thoroughly Soak Your Whetstones
Determine if you have a soaking or splash-and-go whetstone. While the word whetstone seems to imply that the stone is wet, “whet” actually just means to sharpen a blade.
Wetting the stone is up to you. Splash-and-go whetstones do not require a full soaking, but, instead, just need a splash of water.
Other whetstones do require soaking before sharpening. These stones are done soaking once the air bubbles are gone.
Whether you have a soaking or splash-and-go whetstone, you will need to keep the stones wet between strokes as well to allow your knife to glide across the stone without getting more damaged than it was before.
To do this, you can lay the knife down periodically and sprinkle the whetstones with water from your hands.
Step-3: Rub Your Stones
Once your stones have been thoroughly soaked, you may remove the bigger stone, such as the 1000 grit from the water. This is your starter stone, but before it gets to work, rub it down with the finer stone, such as the 2000 grit.
This will flatten the stone and create a sediment build-up. The sediment build-up is what enables the actual sharpening process. If you don’t have a pair of whetstones to rub together, you will need a stone fixer to resurface the stone.
Step-4: Sharpen the Kitchen Knife
You want to guide the knife along the whetstone in the direction of the blade; never press your full tang or half tang blade forward into the stone. To do this, you’ll want one hand gripping the handle of the knife. This hand will determine the direction the blade goes in.
Use a few fingers from your other hand to apply pressure to the actual blade when it is being dragged towards you (blade side facing away from you, of course). With gentle pressure, move the blade from its heel to tip, starting from the front of the stone and moving towards the back.
Applying too much pressure can damage the knife, especially when using a low grit. Again, always keep the stone moist between strokes. Stop and lay the knife down to sprinkle more water onto the stone.
The knife should be at a slight angle as it is glided along with the stone. Instead of measuring the angle in degrees, which can get too technical, just imagine a small stack of two or three coins behind the knife. The key here is to maintain the same angle as you sharpen your knife.
This takes some practice, but keeping the blade against the stone at a set angle will result in the sharpest blade possible. If you need to, measure the blade’s angle with the stack of two to three coins, such as pennies.
Step-5: How Many Strokes Are Enough?
A good measurement of strokes to start with is 10-20 strokes on the first side, 10-20 on the other, and then gradually decrease strokes until you’re down to one and one — one on one side and one on the other.
However, another good measurement is to feel the blade’s burr. A burr is a lip of metal that’s relatively invisible to our naked eye. You want to remove the burr when sharpening your knife.
Feeling for a burr with your fingers will let you know which side you need to sharpen more to even the edge and achieve that desirable “v” shape on your blade.
Step-6: Repeat the Process with Your Finer Stone
When finished with the coarser stone, replace it with the finer-grit stone, such as the 2000 grit, and repeat the process — rub the stone with another to flatten it and build up sediment. Once more, because it cannot be overstated, make sure to keep the stone wet.
Remember, this polishing step can be skipped if you opted for just the 1000 grit whetstone. It is not necessary to use a finer polishing stone to achieve a sharp edge on your knife.
Step-7: Rinse and Hone Your Knife
You’ll want to see a fine sediment build-up on your knife and the whetstone from the sharpening process. This lets you know that you did, in fact, sharpen your knife.
Rinse the knife off and finish by honing it to ensure it’s aligned. Now you should be able to chop crunchy vegetables almost like butter and cut through meat muscle without bending your knife.
Step-8: The Paper Test
To see just how sharp of an edge you have achieved, hold up a piece of paper in front of you and slice it with your new blade edge. You want the paper to be held up, not laid down when you slice it.
The blade should glide right through the paper without leaving behind a snag or tear. The thinner the paper, the harder the test. Magazine paper is a great test of your sharpening skills.
Conclusion
Congratulations! Your knife should have a new and fine edge to it. As satisfying as it may be to get a super fine edge on your knife, remember that this process is not like honing.
Sharpening your knife involves taking some of the material off of it. This does not need to be done frequently. Instead, sharpen your knife when honing it no longer works.
You May Like:
- Best Non Serrated Steak Knife Set
- Best Semi-Serrated Steak Knives
- Best Kitchen Knife Set Under $300
- Best Kitchen Knife Set Under $500
- Best Ceramic Knife Set
- Best Japanese Chef Knife Under $200
- Best Cleaver Knife Under $50
- Best Japanese Cleaver Knife
- Best Damascus Steak Knife
- Best Knives for Cutting Ribs